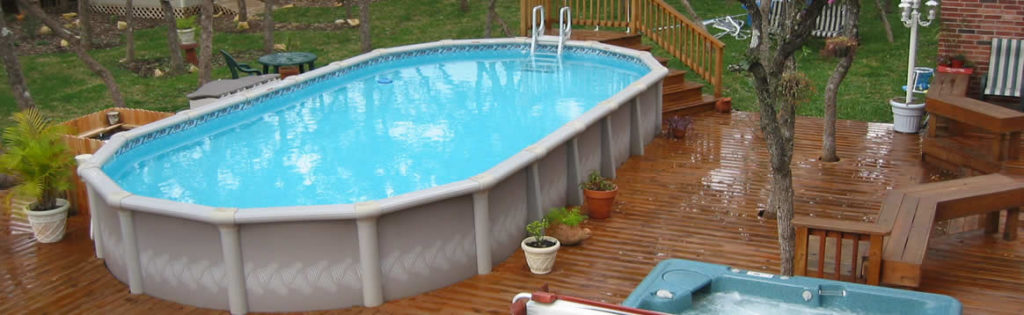
It’s an exciting time when you make the decision to purchase a backyard pool. But inground pool sticker shock is real thanks to rising construction and installation costs. However, there is a way to enjoy a new pool without breaking the bank thanks to YouTube and an above ground pool kit.
Building an above ground pool yourself is not only affordable, but it’s also convenient and straightforward. All you need is one afternoon, a few helping hands, and YouTube. YouTube is a fantastic resource when it comes to installing your new above ground pool, as it allows you to not only save thousands of dollars but gets you swimming just in time for summer.
Read on to learn how to install an above ground pool and where to visit to get all the information you need.
Step 1: Choose a Location for Your Pool
Selecting the right area to place your pool is essential. You want to avoid places in the yard with large trees, as the leaves could make their way into your pool and clog the filters. Not to mention, you’ll have to skim and clean the pool more often.
You’ll also want to ensure that your future pool area is at least six feet from any receptacles or large obstacles. In addition, make sure you choose an area free of utility or electrical lines. There’s a chance those will need to be accessed, and building a pool on top of it isn’t the best idea.
Step 2: Level Your Surface
After finding the perfect area to place your pool, it’s time to level the surface.
- Place one plank at the center of the pool site and the other at the edge. Then tie the twine in between the planks. Doing this will give you an idea of which part of the surface is unlevel. But merely eyeballing is no good—you will need a leveling device for more accuracy.
- Use your level to measure the tightened twine and gauge the area’s flatness.
- By now, you should know where your leveling issues are. It’s your job to smooth the surface out. You can use a shovel to dig out dirt or rent digging machinery.
Step 3: Prepare a Stone Bed
Now that you’ve leveled the surface, it’s time to cut around the perimeter of your future pool.
- Determine the pool’s radius by dividing the pool’s diameter and adding one foot.
- From the center of the location, tie and draw a tape measure that equals the radius you calculated above—this will act as a compass.
- With your compass, draw a circle on the ground with chalk or spray paint.
- Use the marking from Step 4 and cut the sod inside the perimeter.
- Lay out a 16-inch stone bed around the perimeter using stone dust.
- Use a rake and compactor to ensure that the stone beds are entirely flat.
Step 4: Lay Out Component Racks
Now that you have a perimeter around your future pool, it’s time to lay down the racks.
- Assemble wall racks and place them over the stone dust perimeter you made earlier.
- Once the tracks are in place, ensure they form a perfect circle on the stone dust perimeter.
Step 5: Fill the Base of the Pool With Sand
Sand creates a base that protects the liner of your pool. You might have to get sand delivered from a landscaping supplier or garden center for this step. You will need enough sand to create a 2-inch thick layer of sand around the pool site.
- Once you have the sand, use a rake to spread the sand evenly.
- Then give the sanded area some water and let it sit overnight.
- After the sanded area has rested overnight, it will need to be compacted into a solid base for the pool.
- Use a lawn roller and go over the entire base of the pool to ensure that it’s flat.
Step 6: Assemble the Wall
The foundation of your pool is done, so now it’s time to set up the wall of your new above-ground pool. For this step, you will need the help of a few friends.
- When you unroll the wall, you will find that the skimmer is at the end of the roll. Therefore, it’s essential to start on the left of the bottom drain at the center of the first plate.
- Install screwheads inside the pool and nuts on the outside — tighten the screws with a torque of 65 to 85 pounds per inch.
- Put adhesive tape on the wall joints screws to protect the liner.
Step 7: Lay Down the Liner
You’ve reached the final step to building your above ground pool, placing the liner.
- Center your pool liner before opening it up completely.
- Once the center is placed, secure it to the wall.
- Finally, cut the center of the liner to make clearance for the drain.
Your Clarksville Above Ground Pool Experts
While installing your own pool can seem intimidating, with the right resources you can get a new pool in no time. Be sure to watch our in-depth video tutorial on how easy it is to install an above ground pool, and then stop by one of our five convenient locations throughout the area to choose the best model for your backyard. Our above ground pool experts are ready to help you with all of your backyard needs.